
Types of Makeup Brushes: The Five You Actually Need
 ·
Updated August 24, 2026
·
Updated August 24, 2026
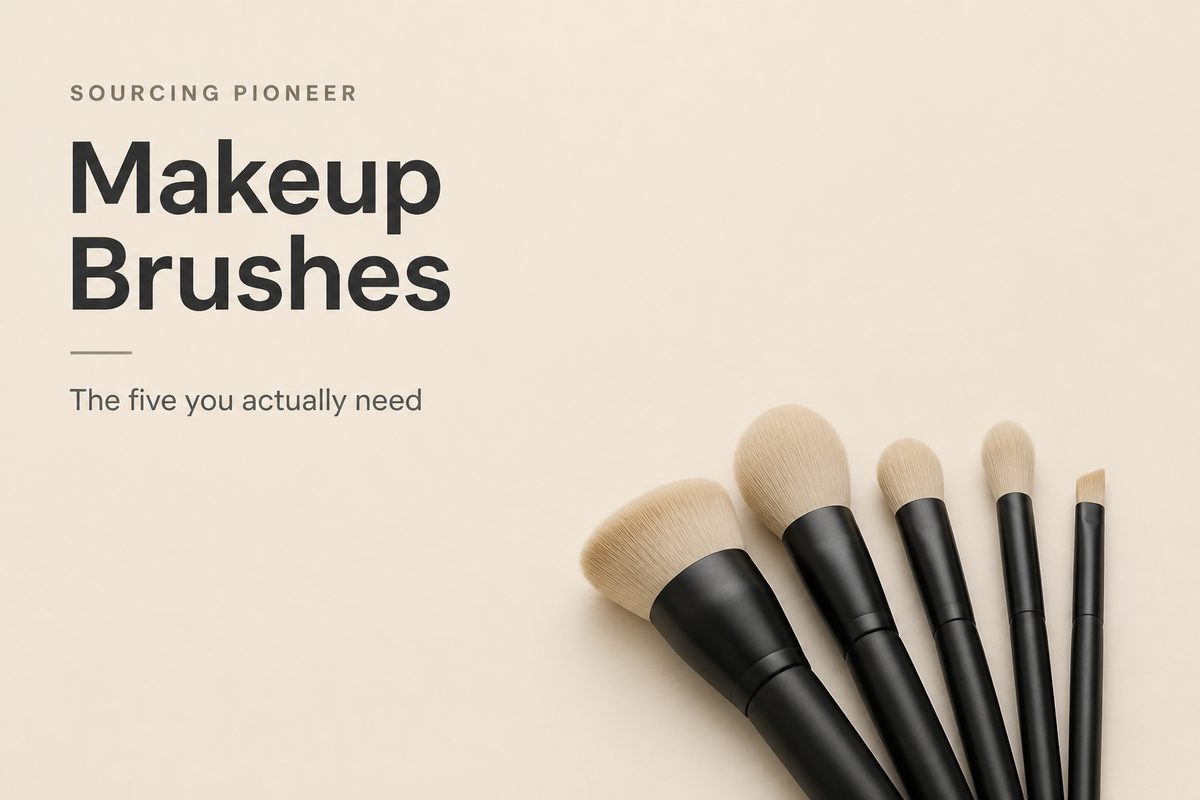
Most brush guides are written by brands selling brushes, which is why they all recommend a fifteen-piece set. You need five. This page covers which five, how to tell a good brush from a shedding one, and — because we are a sourcing company — what those same quality checks look like when you are buying two thousand of them instead of one.
Powder makeup needs natural bristles. Liquid and cream makeup needs synthetic. Get this one thing right and patchy foundation, harsh eyeshadow lines and wasted product mostly disappear.
Why the brush matters more than the makeup
Four complaints come up again and again, and all four are brush problems rather than skill problems:
None of these need better makeup. They need the right tool and a wash routine.
The five brushes that cover a full face
Skip the twelve and twenty-piece sets. These five handle daily makeup for work, school and going out.
1. Foundation brush — dense synthetic
For liquid foundation, cream foundation and tinted moisturiser. A flat head gives fuller coverage on cheeks and forehead; a rounded buffing head is more forgiving for beginners because circular blending leaves no brush lines. Tap off the excess on the back of your hand first — that single habit prevents most cakey results.
2. Tapered powder brush — soft natural
For setting powder and loose powder. The pointed fluffy top lays powder on the T-zone and under the eyes without dragging the foundation underneath. Lighter and easier to control than a big kabuki.
3. Small fluffy blush brush — medium natural
For powder blush and light cream blush. Keep it palm-sized. A small head puts colour on the apple of the cheek instead of across half your face, and natural bristles pick up powder gently so you cannot overload in one go.
4. Blending brush — ultra-soft natural
The most important eye brush there is. A flat brush puts shadow on; this one removes the hard line where it ends. Sweep along the socket edge and the gradient does itself — no technique required.
5. Angled detail brush — firm synthetic
For brow powder, deepening the outer eye corner, and tidying a lip edge. Firm bristles hold powder precisely and the angle fills brow gaps in a few strokes. One brush, three jobs.
What to add after the five
Only once the basics feel automatic, and only if you actually miss it:
Notice none of these replaces one of the five. Sets sell you eight brushes that overlap; adding one at a time when you feel the gap gives you a kit you actually use.
Natural or synthetic: the rule
Brand guides blur this because mixed sets sell better. The rule itself is simple.
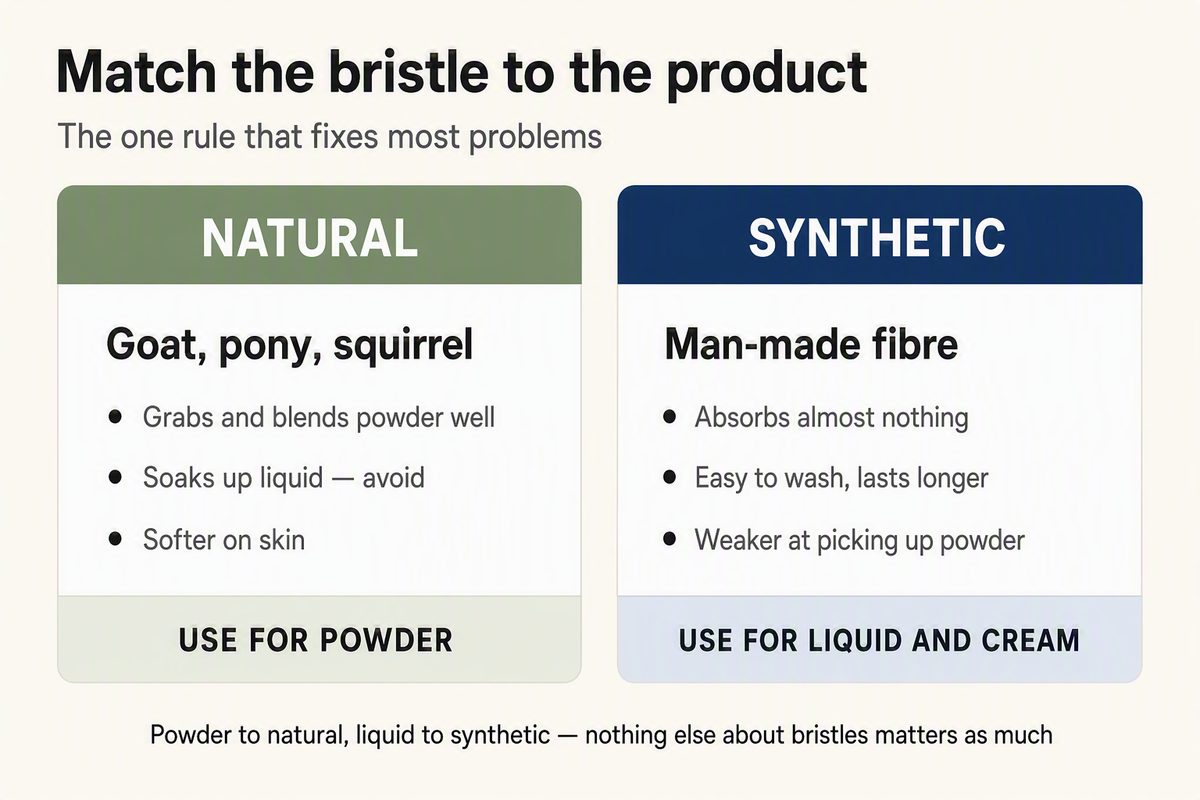
One line to remember: powder → natural, liquid → synthetic. Nothing else about bristle choice matters as much as this.
Three tests for a good brush
These take ten seconds each and work in a shop or with a sample on your desk.
What you are paying for
Brush prices run from a couple of dollars to well over fifty for a single head, and the difference is not mostly branding. Three things drive the cost.
What this means in practice: spend where the brush touches product, save where it does not. A good blending brush changes your eye makeup noticeably. A premium handle does nothing. If your budget only stretches to one good brush, make it the blending brush.
How to wash them
How often depends on what the brush touches:
The washing itself, in four steps:
1. Warm water and mild shampoo
Baby shampoo or a dedicated brush cleaner. Not facial foaming cleanser — it strips the bristles and leaves them brittle.
2. Point the head downwards
Rinse the bristles only. Water that gets into the metal ferrule dissolves the glue holding the bristles, and that is what turns a good brush into a shedding one.
3. Rub gently on a textured pad
A silicone cleaning mat, or the palm of your hand. Work the product out; do not wring or twist the head.
4. Dry flat on a towel
Never upright. Standing a wet brush handle-down sends water straight back into the ferrule — the exact thing step two avoided.
Between washes, a dry sponge wipes leftover eyeshadow off in seconds so you can switch colours without cross-contamination.
Storing them so they last
Two habits undo good brushes faster than anything else, and both are easy to fix.
Standing them bristles-up in a jar is the usual advice and it is fine once they are dry. Wet is the problem — water runs down into the ferrule and loosens the glue. Dry flat, then store upright.
Loose in a make-up bag crushes the heads. A brush spends most of its life pressed against whatever else is in the bag, and a head bent sideways for months stops springing back. A cheap roll or a case with slots solves it.
One more thing worth knowing: brushes do not need replacing on a schedule. They need replacing when they fail the bounce test or shed every use. A well-treated natural brush can outlast a neglected one several times over, which is the real argument for washing them properly rather than buying more.
Buying brushes in bulk
Everything above assumes you are buying a brush for yourself. If you are ordering hundreds or thousands to resell, the same quality questions apply — but you are asking them of a factory, before production, rather than of a brush in your hand.
This is the part most brush guides leave out, so here is what actually changes.
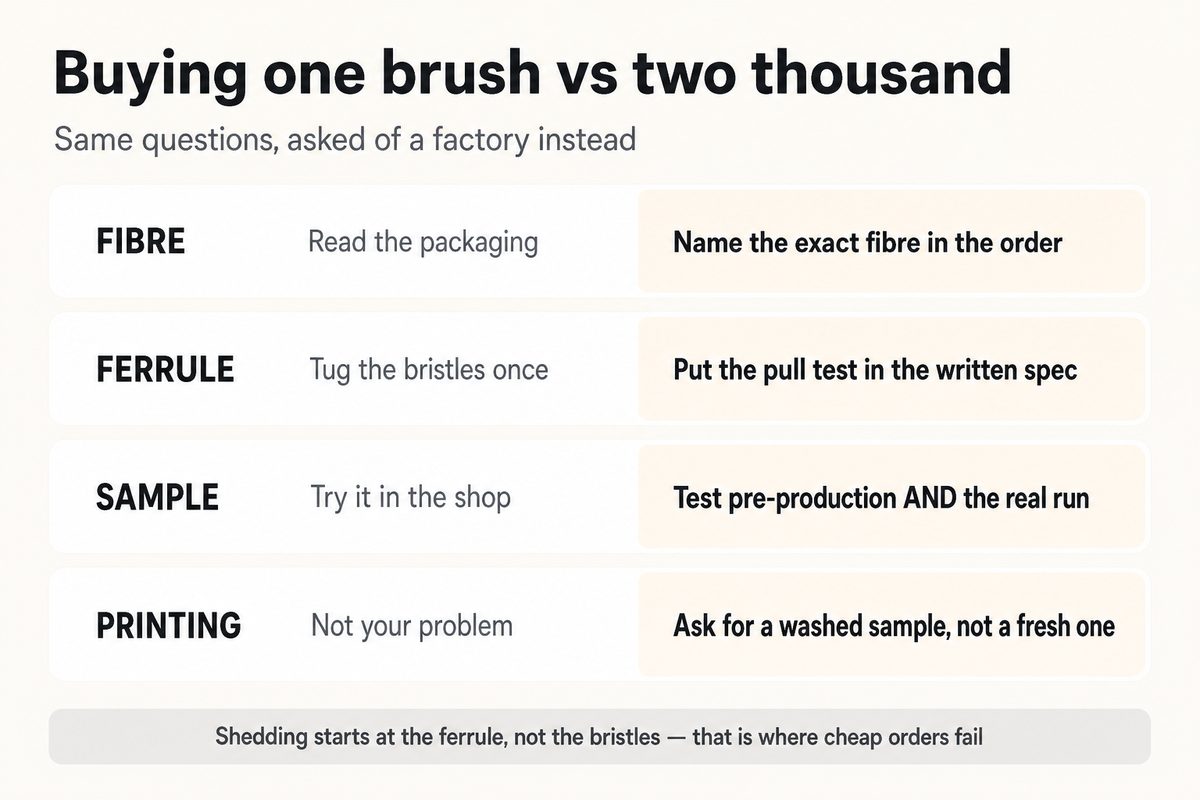
1. Name the fibre, not the category
“Synthetic” covers a wide range of quality. Ask for the specific fibre type and, if the supplier claims a branded fibre, ask which one. “Natural” is worse — goat, pony and squirrel behave differently and cost very differently. A quote that just says “natural hair” is a quote you cannot compare with anyone else’s.
2. The ferrule is where cheap orders fail
Shedding almost always starts at the metal ferrule, not the bristles. Ask how the head is fixed — glue type and whether the ferrule is crimped — and put the pull test into your written quality standard. A brush that passes on the sample bench and fails at volume usually changed glue, not hair.
3. Test the sample the same way twice
Do the pull, skin and bounce tests on the pre-production sample, then again on units pulled from the actual production run. The gap between those two results is the thing worth knowing, and you only see it if you test both.
4. Printing and packaging outlive the brush
If your logo is printed on the handle, ask what happens to it after washing. A brush gets rinsed weekly for two years. Printing that survives a wipe test in the factory may not survive that. Ask for a washed sample, not a fresh one.
On sourcing itself: brush factories cluster with the wider cosmetics-tool trade, and a great many sellers listing brushes online are traders rather than makers. That is not automatically a problem, but you should know which you are dealing with — it decides your minimum order, your unit price, and who actually controls the glue. Checking whether a supplier is a factory or a trader takes about two minutes on the business licence.
If you are buying beauty tools as part of a broader first order, the full buying process covers the stages either side of this one — choosing a channel, payment terms, and what the landed cost really comes to once freight and duty are added.
Two other things catch people out on a first beauty-tools order. Cosmetics tools often carry testing requirements in the destination market, and those rules belong to your country rather than your supplier — check them before you order, not when the goods land. And brushes are light but bulky, so freight is charged on the space they take rather than their weight. A pallet of brushes can cost more to ship than its weight suggests, which is worth building into the landed cost.
If you are weighing up a supplier right now, the claims that sound reassuring but are not covers the phrases that come up most in beauty sourcing.
Get the fibre and ferrule spec right first
Tell me the brush type, quantity and target price, and you will get back the specification questions worth asking — plus an honest read on whether that price buys the fibre you think it does.
Send an enquiryCommon questions
Can I use one brush for everything?
Not well. Mixing liquid and powder on the same head ruins the texture of both, muddies colours, and holds far more bacteria. The minimum sensible split is one synthetic brush for base makeup and one natural brush for powder — two brushes, and most of the problem goes away.
How often should I wash my brushes?
Foundation and cream brushes every three or four uses, because wet product breeds bacteria quickly. Powder face brushes and eye brushes once a week. If your skin breaks out along the cheeks where your foundation brush lands, that is usually the answer.
Are natural bristles better than synthetic?
Neither is better; they suit different products. Natural hair grabs and blends powder better. Synthetic absorbs nothing, so it applies liquid and cream without soaking up a third of your foundation. Match the bristle to the texture and the price difference stops mattering.
Why does my new brush make makeup look patchy?
Two likely causes. Either it is a natural-bristle brush being used with liquid foundation, or the head is too large to place product where you want it. Check the bristle type first — that fixes it more often than technique does.
How long should a good brush last?
Washed weekly and dried flat, synthetic brushes run two to three years and natural hair one to two. Replace when the head stops springing back or sheds every time you use it. Drying upright shortens both figures considerably.
What minimum order should I expect for private label brushes?
It varies enormously with what you are asking for. A stock handle with your logo printed on it is a much smaller commitment than a custom mould, and a custom fibre blend is different again. Ask for the minimum against each of those three separately — suppliers often quote the highest one if you ask in general terms.
Questions & Comments
We read every one and reply within 24 hoursStuck on which brush does what, or sourcing beauty tools and unsure what to specify? Ask below — bristle types, quality tests, minimum orders, or a supplier quote you want a second opinion on.